Our home is our safe haven, right?
The place where we feel most safe and secure.
Our living rooms in particular are the place we come together as a family and relax. But for little guys, there are many hazards and dangers in their own living room.
No need to panic – a few steps can change this!
You can make your home much safer for your child by making a few changes. This will mean that their home is safer for them and that you can relax more knowing this.
Check out the steps below to look at each area of the living room, one at a time, to see what you can do to reduce the safety risks for your little one!
Why ChildProofing Living Room Important?
Let me tell you a story:
I was sitting at the end of our chaise lounge and two of my kids were playing in front of me. My son had just turned four and it was around my daughter’s second birthday. They had a pretend picnic and “fed” me some of their food.
My son wandered off to another room and called to his sister. She played for a bit more alone then joined him.
The second my daughter stepped out of the room, our tv crashed down from above the fireplace and landed exactly where she had been sitting. She had stood up only seconds before and my son was maybe another minute before her.
The TV had some damage, but both kids were fine, of course, since they had moved before the TV fell. Had this played out differently, had they stayed to eat one more course of their pretend meal, it’s likely they both would have been seriously injured.
In “toddler vs projectile large screen TV,” toddler does not win.
Here the thing:
There was no reason for the TV to fall. No kids were jumping around or bouncing off the furniture. There was no rumbly trash truck outside rattling the windows. The TV was in the same position it had been in for months.
The only movement in the house was a toddler quietly walking out of the room and my head turning to watch her. The TV still fell. Baby proofing is for moments like these.
Every year, almost 15,000 kids go to the emergency room to treat injuries that came from furniture falling on them. Another 2,000 kids die each year from accidents that take place in their homes.
Experts believe that the large majority of serious injuries and deaths that happen to kids in the home could be prevented if safety information was better known and implemented.
We can’t control everything in our kids’ lives.
We can’t control most things in our kid’s lives, and I don’t believe we should try.
Sometimes, when we put a few safeguards in place, we can have the security to allow our kids to play freely.
Parents get peace of mind. Kids get to explore and learn. That’s something we can all get on board with.
How to Baby Proof Cabinet and Drawer
The whole reason for drawers and cabinets is to put away things that we don’t want out.Some of this is for organization purposes. Some of this is to make the rest of the home look tidy. Some of this is to put away private or dangerous items. The last one is the reason cabinets and drawers need baby proofed.
Think about the things you put in drawers and under your kitchen sink: batteries, knives, cleaners.
These are some of the primary items you want to keep out of reach of a baby or small child.
The most basic part of this section is to remove dangerous objects from anywhere a child could reach them. Toddlers are amazingly good at finding things we don’t want them to find. Cleaning supplies and other chemicals need to be stored well out of reach in a baby proofed cabinet.
Batteries and choking hazard objects, which are any objects that can fit easily through an empty toilet paper roll, also need to be locked up out of the reach of a baby or small child. The following tips will tell you the different ways to secure your cabinets and drawers once they contain these dangerous items.
1. Traditional drawer latch
There are a couple of options for baby proofing drawers. These are spring-action locks.
They work by users installing a little lock on the top of a drawer or inside of a cabinet. Then a long latch is installed near the opening. These pieces catch and lock together. They can be opened by pressing gently down on the latch.
There are some benefits to latches. They are great for homes with babies and older kids who still need to get into drawers and cabinets independently.
Usually, older siblings can navigate this type of latch once an adult shows them how. That’s a wonderful bonus because all parents know how wonderful it is once kids can start reaching their own cup, spoon, etc and no longer need you to get it for them.
Another bonus is the price. These are just plain economical. You can buy a box with more than you’d probably need for less than five dollars.
The flip side of this is that these are not permanent. The time they last depends on the frequency they are used, which means how often that drawer or cabinet is opened.
Eventually, they sort of lose their shape and springiness and the latch no longer presses against the holder. At this point, they no longer function to keep little hands out.
2. Magnetic drawer and cabinet lock
There are similar devices that work magnetically.
For these, a small magnet is stored, usually on a refrigerator, and placed on the outside of the drawer or cabinet over the installed lock to open it.
These are temporary, don’t require any holes or screws to install, which is great!
They can hold huge amounts of weight, which is great if you have a climber. It’s not at all uncommon for a toddler to hang on drawer handles, which can cause some types of drawer locks to open and even break off.
The downside is that you have to keep a key to open every drawer or cabinet that has these installed on it. That’s a hassle and can be a huge hassle if you misplace it. You can easily order replacements on amazon, but you’ll be stuck out of that drawer until it arrives.
3. Buckle style cabinet and drawer lock
Another type of drawer and cabinet lock is the buckle style.
These come with two parts, most common attached with strong adhesive. One part goes on the side of whatever you’re trying to secure. The other goes on the surface of it. The end that does not have adhesive buckles into the other end.
These only work well for cabinets and drawers that have a right angle next to them. This means they aren’t good for drawers in the middle of a row or cabinets that have two doors that open in the middle.
For furniture that meets these requirements, these buckle devices work great. Like the latches above, they are workable for older kids (though it does seem like younger children figure these out sooner than some of the others). They’re convenient and handy for adults.
I have had issues with the adhesive not sticking well to certain surfaces, but that may have been user error.
4. Slide cabinet lock
The final way to baby proof cabinets is a slide lock. These only work on situations opposite the one above. These are for cabinets with two doors that open in the middle. Both doors must have handles.
These are very easy to install. You open it, typically by squeezing and sliding the connector piece off one end of the loop, then slide the loop through both handles and replace the connector piece.
These are fairly cheap and very hard for children to operate. This is great in that it meansyour toddler won’t be getting anywhere near your cleaning supplies.
It’s not as great because it also means that older kids can’t open these locks easily. I’veeven met some adults who struggle with slide locks. Because they’re so sturdy, I preferthese types of locks for cabinets with really dangerous items, like bleach. I don’t minddealing with something that’s difficult to open if it’s only on one or two cabinets, and it gives me a lot of peace of mind.
How to Baby Proof Fireplace
The fireplace is a conglomerate of risks for young children. The hearth typically has sharp, hard corners. There is often a collection of sharp dangerous tools sitting nearby.
More importantly, a fireplace has, of course, a fire. Fires are beautiful and bright. They can draw in small children just about as quickly as they draw in bugs.
Unfortunately, small children don’t yet understand the risks associated with fire.
Burns from a fire can be very serious very quickly. A toddler who accidentally grabs a knife can cut themselves, but you typically have some time to remove it from them before this happens.
A toddler who sticks their hand in a fire is instantly burned.
A child who falls down the stairs may be hurt or may be fine.
A child who falls into a fire is certainly going to have some degree of injury, probably a serious one.
Burns from a fireplace can be very serious and happen so quickly.
If you only babyproof one part of your living room, I suggest it be the fireplace.
Keep reading to learn about some of the best ways to keep your young family and friends safe if you have a fireplace.
1. Safety fence
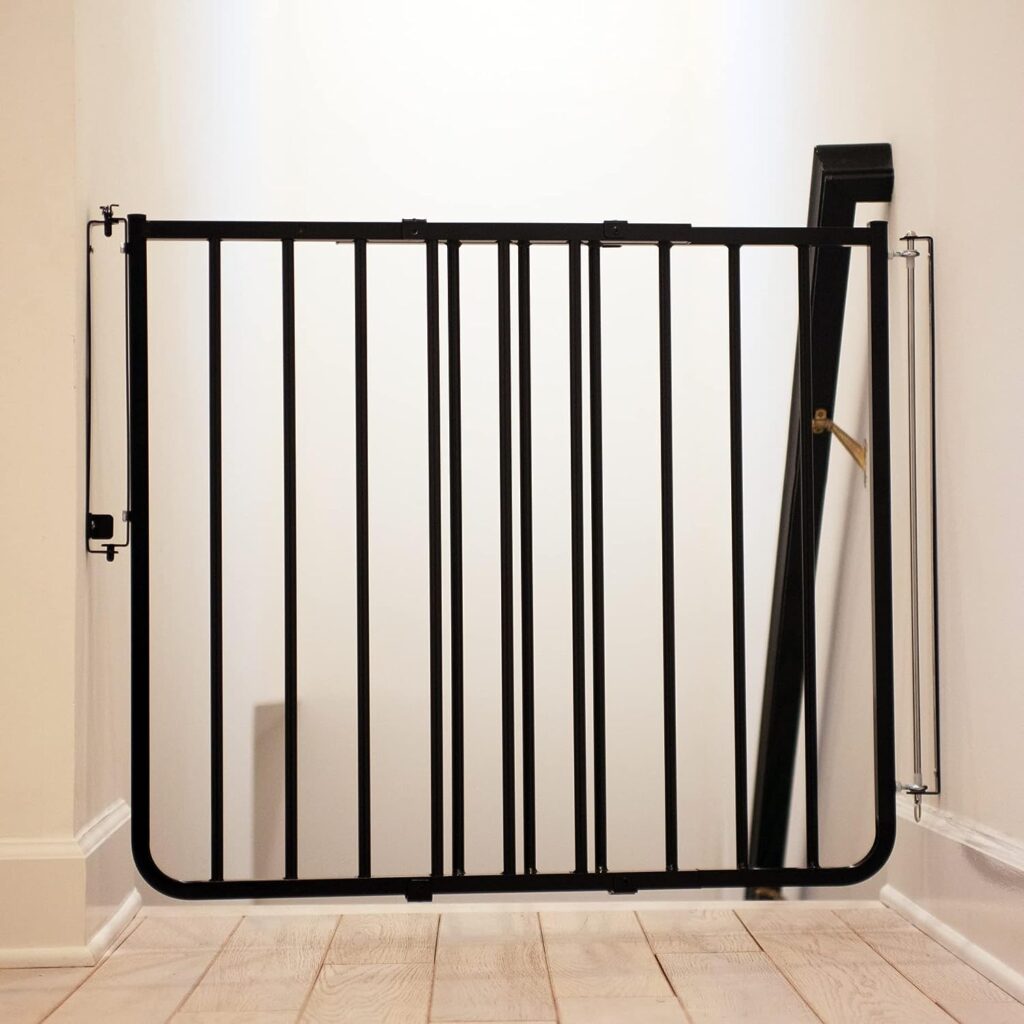
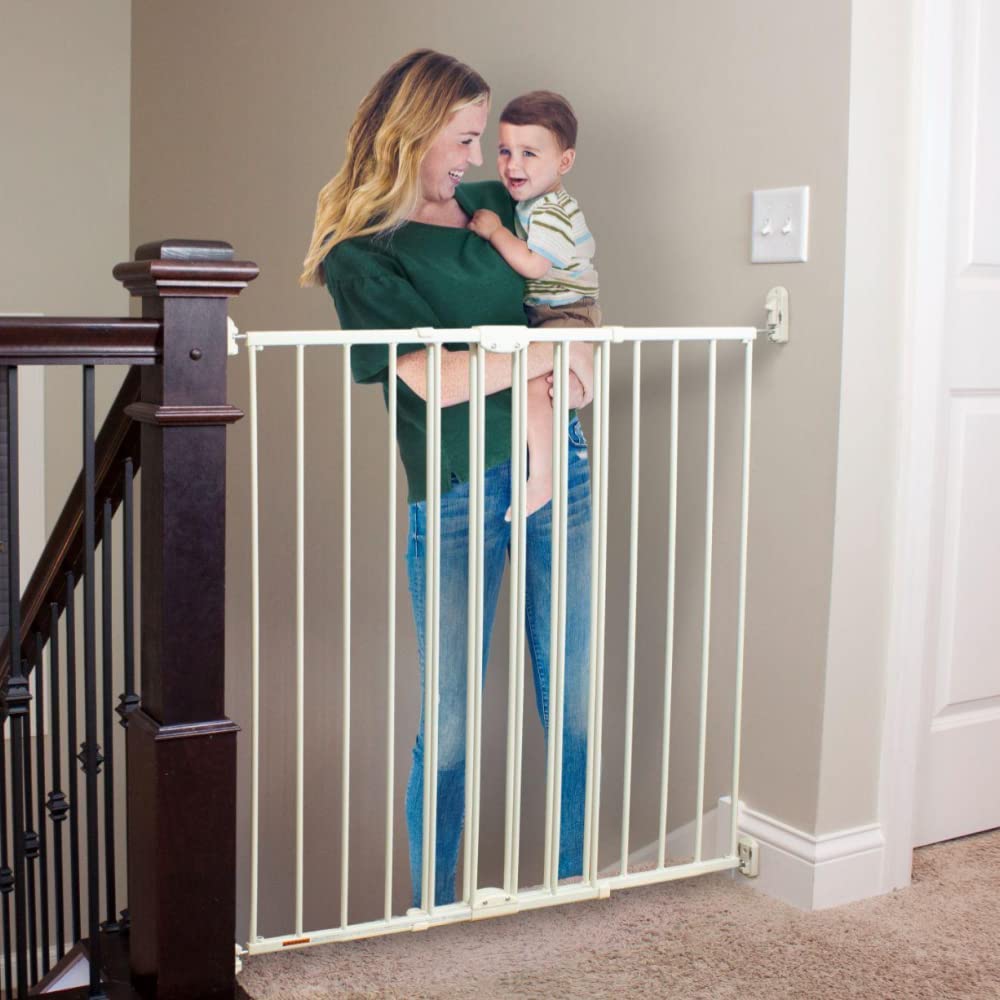
The simplest way to baby proof your fireplace is to get a safety fence.
These have some serious positives and negatives.
The positives are that it’s a “one and done” situation. If you use one of these, you don’t need to buy a liner for your hearth. You don’t need to secure your fireplace tools, and your little ones can’t get anywhere near the flames.
The negatives are that these are pricey. It’s easy to spend $200 on one. If you have a child who can climb over baby gates, this won’t stop them. Because of that, this type of fence is only safe for children 24 months and younger. In the same vein, it’s inconvenient for an adult to step over and not all have gates to walk through, which means some families may find this difficult to use.
It also takes up a big chunk of your living room, which may be a space problem. And it can dramatically take away from the decor and fashion of the room.
These types of gates are extra sturdy because they are attached to your wall with drywall anchors or directly into a stud. The flip side of this is that your wall will have holes after this product is removed.
Check out this link for more details about this: https://babygatesexpert.com/baby-gates-for-impossible-scenarios/
2. Hearth cover
If you want to consider a different option, you might need several different parts.
You’ll need to encase your hearth somehow if it is not flush with the rest of the floor. You’ll need something to keep distance between Baby and the fires, and you’ll need to move your fireplace tools to a more secure location.
Will protect little heads from bumping into the corner of a classic fireplace hearth.
I’ve used this exact one on my own home and it held up well. For some reason, little kids seem to love peeling these off, but most are very easy to stick right back in place.
You can also use a seat cushion like this that essentially turns the fireplace into a padded bench.
which serves the same purpose as the edge guards above.
3. Fireplace screens
If you aren’t using a fireplace fence and still want to use your fireplace, you should check out fireplace screens. These are tiny versions of the fence and sit right up against the opening to the fireplace.
These are rarely secured to anything so a strong curious child might be able to move one, but that would be impossible for most kids. For a child who could do this, it would certainly take time and effort and make a lot of noise. You could think of this as a deterrent, but not quite child-proof.
If you go with this option, it would provide you with security to let your child play freely while a fire burns and you’re in the same room without you having to hover over your kids or the fire. I would not recommend leaving them unattended with only this type of protection.
How to Baby Proof TV Area
You already heard about my terrifying experience with a TV nearly crushing my toddler so you can guess that this is an area of baby proofing that I take especially seriously.
TVs are big and heavy. Today’s flat-screen models may be lighter than the vacuum TVs that used to be so common, but they’re also much easier to tip.
Luckily, it seems that manufacturers have realized this.
Most newer TVs come with bases that have screw holes to attach the TV to a TV stand or with backs that are equipped to mount the TV on the wall.
Below we’ll look into these options more and see what steps you can take to make sure you never find yourself in the situation I was in or worse.
1. Anti-tip strap
One option for securing your TV is an anti-tip strap. These work the same as furniture straps. In fact, often the same strap can function as either.
These straps work to hold the TV in place by screwing into the TV stand at the bottom and the TV at the top, in the screw holes designed for wall mounting. Once the installer creates tension in the strap, it will not be able to tip forward onto a child.
These are fairly easy to use and cheap. You do have to create permanent holes in your TV stand to use these.
2. Furniture straps
Another option is to bolt your TV into your stand (modern TV’s often come with a kit designed to be used for this), and using furniture straps to brace your stand to the wall. Here is an example of a furniture anchor:
These also work well for securing cabinets and other tall furniture that a child might tip over onto themself.
Furniture straps work the same as the TV straps described above. They screw into a stud on one end and are attached to the furniture on the other end.
This is a very secure option but does leave holes in both your wall and furniture.
3. Wall Mounting
Wall mounting a TV has been increasingly popular. Most TV’s come prepped for this, though you have to purchase a wall mount kit separately. This isn’t typically something done for baby proofing. Many TV owners mount their TVs because they want the TV in a certain location or like the look of it mounted, but it works quite well to keep it out of reach of little fingers and unable to tip over.
4. Safety gate
A common option is to use a fireplace fence around your entertainment system. It might seem a little silly to use something designed for a fireplace in front of a TV, but this setup works great.
Again, this is ineffective if you have an escape artist toddler who can hop right over a baby gate and should not be used for toddlers over 24 months, but for most littler guys, these are fine. They take up a lot of room, as mentioned in the fireplace section, are typically pricey, and require you to put holes in your walls during install.
But they are an easy, effective way to secure an entire area without disrupting the functionality much for older users.
How to Baby Proof Windows
I have another story for you here:
We had just moved into a new home with windows that went down to the floor. I noticed that one of these windows had a very loose screen, probably from the previous owner’s dogs jumping against it.
I knew my kids might lean against the screen to look outside so I kept that window closed until I could replace the screen, and checked the other screens all of which seemed secure.
One beautiful spring day, I had all the windows open except the one with the loose screen. My one-year-old was helping me put laundry in the dryer when she ran into the other room to peep at her brothers in the backyard.
I called to them, “If she’s talking to you through the window, remind her not to touch the screen,” but before the words were out of my mouth, my son yelled that his sister had fallen out the window. I guess she ran straight through it.
She fell head first onto a concrete patio below but she was absolutely fine. In a bizarre series of events, the window screen had stayed partially attached and created some sort of a slide for her down to the patio where she landed in a huge flower pot full of dirt. She had bumped her head, was super dirty, and terrified, but no worse for the wear. I did not fail to realize how lucky we were.
First of all, this was a low window.
If this window had been at a normal height or if the flower pot wasn’t there, she would have landed on her head after falling about five or six feet onto concrete. That’s no mild head injury.
More seriously, if this had been on a second story or higher, a flower pot full of soft dirt or an attached window screen would have made absolutely no difference.
I had just checked the screens, guys, and this one was secure. She was in the room without me for not even 5 seconds, maybe only 2 seconds, and I was one room over, ten feet away.
I had warned her about touching window screens and warned her brothers not to talk to her through them as that might encourage her to lean on them. I did all the things and she still busted through that day.
We were all a bit traumatized by this (even she swears she remembers it), but it’s now become a bit of a funny family story. Like with the falling TV, we were lucky. Not everyone is, though, and there are certain precautions that you can take to make sure that your child stays safe around windows.
1. Window locks
A super simple way to keep your kids safe around high windows is to just keep them locked. If your windows don’t have locks built-in, you can purchase them here.
2. Bars or screen
Another option is to install bars or a special screen on the inside of your window. The bars definitely have a prison vibe to them, but they are just about bulletproof when it comes to safety.
The screen-style window covers
look much more friendly, though they may not be quite as kid-proof as the bars.
Both of these options allow you to still open your windows and let in some fresh air while knowing your little ones are safe.
3. Window guards
Window guards halt your window from opening too much. There are different types for the different types of windows. These only allow windows to open a few inches so that no child could fall through them. Window guards are cheap and effective.
4. Blind cord retractors
One of the biggest concerns when it comes to windows is cords.
These can become tangled around a young child’s neck and strangle them quickly. Blinds with long hanging cords are becoming obsolete, but slowly. If you have window treatments with long hanging cords, your best option is to replace them.
Shades are cord-free and there are plenty of blinds that operate accordion-style and no longer have strings. Replacing window treatments can be quite expensive so if that isn’t in your budget or you rent, you can try these blind cord retractors:
A pretty simple device that holds in the cords so nothing is dangling down.
How to Baby Proof Floor
This is probably the simplest section of baby proofing. Some rooms don’t even need this done.
Toddlers and babies need soft surfaces, especially when they are first learning how to get around. Rough, cold, or hard surfaces are uncomfortable for babies’ hands and legs when they’re learning to crawl.
Have you ever seen a baby who crawls with their bottom up in the air and just their hands and feet on the ground? This is often an adaptation to a home with an uncomfortable crawling surface.
More importantly, once a little one starts walking, they need a safe, soft place to crash land until they’re steady on their feet. This takes much longer than many new parents anticipate. It may only take a few weeks for a toddler to go from their first steps to walking independently, but the next few years will be filled with spills, tumbles, and falls.
1. Carpeting
If your living room is carpeted, there is probably nothing more you need to do to baby proof the floor. You may want to check how rough the carpet feels by rubbing your hand across it, but the majority of carpets will make a great surface for little ones learning to move around.
2. Rugs
If your living room is not carpeted, you’ll need to add a rug. A thick plush rug will feel cozier to a little one when they fall, but any rug will provide protection to a child learning to move. A rug will also keep a crawler more comfortable as they won’t have to touch the cool wood, cement, or tile.
3. Carpet pad
An often overlooked, but very important detail here is a pad for your rug. If you have carpet installed, there will be a pad underneath it. This is a large part of what makes it cozy and cushy. Adding a rug is a great first step, but it will be safe and more comfortable with a thicker pad underneath.
Unrelated to safety, this will also prevent the rug from slipping or sliding around when people walk across it. It will protect your floor from the back of the rug, which can be surprisingly scratchy and rough on wood floors.
Some Do’s and Don’ts
Do’s
- DO use the toilet paper roll test: can an item fit in an empty toilet paper roll? Any item that can is a choking hazard and needs to be removed from a young child’s reach.
- DO teach your little one about the hazards. Just because you have a fireplace gate does not mean that your little one does not need to be warned about fire safety. When they hold onto the gate and look at the fire, remind them, “Isn’t the fire pretty? But we never touch it. Fires can burn us. That hurts so much!”
- DO make sure grandparents, older siblings, and babysitters are aware of the safety issues that are not fixable by babyproofing.
- DO not assume your living room is completely secure because you took these steps. Babies and young children must be supervised.
Dont’s
- Do NOT leave a child unsupervised in a room with blind cords.
- Do NOT leave a child alone in a room with unlocked or opened windows
- Do NOT leave hazardous substances and cleaners where a child can reach them.
- Do NOT leave small items where a young child can reach them.
- Do NOT assume more expensive is better. That may be true for looks or quality, but most items designed to keep babies safe will keep them safe. If not, no one would buy them and they wouldn’t be on the market long.
- Do NOT consider this a complete list. Check out your space. The same way you may be able to ignore the section about fireplaces if you don’t have a fireplace, you may need to secure a door to a balcony if you have one of those in your living room.
Final Words
When it comes to baby proofing, the most important thing to remember doesn’t have anything to do with safety: it’s so easy to get caught up in worry about our little ones. It’s easy to feel like we have to do everything just right to protect them and keep them safe.
That’s not possible and that’s not the point of baby proofing.
Baby proofing is a way to create an environment that allows parents to know they’ve done what they can to keep their baby safe so that they can relax and their baby can play freely.
Once you’ve baby proofed and taken the right steps, you can know you’ve done your best. That’s the whole point.

