Don’t ask me how, but kids can make that beautifully pristine new car seat look grungier than the bottom of your bathroom trash can in like 2 seconds flat.
This means that you truly need to have the necessary skills of cleaning a car seat learned almost from the moment you bring them home from the hospital.

When they are babies, we all know that our children make lovely messes from both ends, and toddlers aren’t much better with their grubby hands that everything sticks to and notorious rates of spillage with their food and drinks.
So be prepared to know the proper steps to get from dirty to clean and use this handy guide to make sure that you don’t make any critical mistakes along the way. Truth be known, you actually can ruin a seat from washing it incorrectly and that’s no joke
Step One: Remove child from the car seat
Trust me when I say that it is nearly impossible to get your car seat looking spiffy again while Johnny is still buckled in. You might get a quick wipe of the buckles, straps, or armrests, but really that only helps in the short term. For best results, make sure the seat is empty.
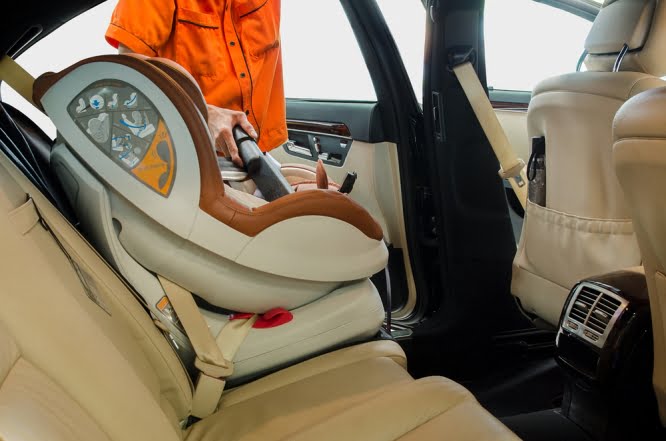
Step Two: Remove the car seat from the car
Seriously, most car seats are going to be much easier to get clean if you have some elbow room to work.
I will agree that there are certain car seats that advertise how easy they are to clean while still installed because they have specialized “Easy-to-Remove” covers. If that’s the case, you’ve hit the jackpot. Otherwise, bring it into the house.
Step Three: Find and read your manual
Yes, I am talking about that little booklet that you typically don’t bother to keep or throw in the bottom desk drawer.
Keep it. File it. Store it with your seat. Make sure it is handy because you will need to know what it says to get this part right. Every manufacturer is different in what they allow to be done to their seats in order to get the yuckies gone.
Step Four: Can’t find your manual? Look it up online!
We know that this is likely the way most parents will need to go because they can’t find the elusive book. (If you are a well-organized person, you probably can skip this step because you’ll already be half-way done reading your manual by now!) Once you find the section on HOW To CLEAN this CAR SEAT then you know you are on the right track.
Step Five: Determine if you can use your washing machine or dryer
That’s right. This is the main bit of information that you are searching for in that handbook. What is allowed? Do you need to handwash the components or at least some of them? Can you use a dryer or must you use a drip-dry method? Of course, this is in reference to the fabric cover portions of your car seat only!
Step Six: Take photographs before dismantling the car seat
The car seat manual isn’t going to tell you this, but believe me, whatever little diagram they are supplying you with probably won’t be adequate for taking the guesswork out of how it all supposed to look when you have it put back together again. Don’t undo anything until you have snapped pictures of all the parts, including the backside!
Step Seven: Carefully remove the car seat cover, straps, and buckles
I say carefully because you will want to keep track of all the various parts. Some areas will be harder to unhook or remove, so be prepared for this possibility.
There will likely be hidden clips or snaps or tight spots. Lay them out and pay attention to all the sections so that you can remember what all is there and how it all goes back later.
Step Eight: Wash the washable portions
One of the MOST IMPORTANT steps is making sure you don’t mix up the washable vs wipeable sections!
Machine-wash, handwash, or soak ONLY the parts of the car seat that are allowed to get totally wet and even then, pay attention to whether you must use hot, warm, or cold water. This will most likely be fabric areas and maybe buckles.
Step Nine: Remove all crud from cracks and crevices
A tiny vacuum attachment works great for getting loose stuff out of the deep dark crevices that reside in the hidden recesses of most car seat bucket frames.
Sometimes the only things that work for the tiniest spots are wettened cotton swabs and toothpicks, though, which I have been known to use many times, especially inside buckle slots!
Step Ten: Wipe the wipe-able portions
NEVER submerge ANY straps or webbing on ANY car seats! Wipe ONLY! And of course, the main seat frame is also only to be wiped. NEVER POWERWASH or hose down any part of a car seat or it will be ruined due to force or hidden rust damage.
Use a baby wipe or washcloth with water & mild soap or detergent to clean any sticky or gross areas.
Step Eleven: Set everything out to dry and then reassemble
If the manufacturer allows some dryer time for the fabric cover, that will certainly speed up this process. Otherwise, it’s all “hang it out to dry” for awhile.
Thankfully, you will have your photos from earlier to help you remember how to put everything back together (If you skipped that step, you will likely regret it!) Reassembly generally requires patience.
Step Twelve: Re-install and then take a well-deserved rest!
Ahhh! You made it to the end and now you can take your child back out on the town in style and comfort in their clean car seat!
But chances are, you are probably too exhausted to go anywhere, so just kick back, relax, and enjoy the rest of the day off. If you are anything like me, you’ll agree that that is enough aggravation for one day!


